How to Repair a Roof Ridge Capping on Your Australian Home
 If you live in Australia and own a home with a tiled roof, you may eventually need to repair or replace the ridge capping. The ridge capping is the pointed or rounded cap that sits on top of the roof where the two sides meet. It’s important for both the structural integrity of your roof and the overall aesthetic appeal of your home.
In this article, we’ll go over how to repair a roof ridge capping on your Australian home. We’ll cover the following subtopics:
- Signs that your ridge capping needs repair
- Materials and tools you’ll need
- Steps to repairing your ridge capping
- Tips for preventing future damage to your ridge capping
Signs that Your Ridge Capping Needs Repair
Before you start any repair work, it’s important to determine if your ridge capping needs fixing. Here are some common signs that your ridge capping may need repair:
- Cracked or broken tiles: If you notice any tiles on your roof that are cracked or broken, it’s likely that the ridge capping has been damaged as well.
- Missing tiles: If you have missing tiles on your roof, it can cause water to seep through to the ridge capping and cause damage.
- Uneven or sagging ridge capping: If your ridge capping is uneven or sagging, it can be a sign of underlying damage to the structure of your roof.
- Damp or moldy attic: If you notice dampness or mold in your attic, it could be a sign that water is seeping into your roof through the ridge capping.
If you notice any of these signs, it’s best to call a professional roofer to inspect your roof and determine the extent of the damage. In some cases, you may need to replace your entire roof rather than just repairing the ridge capping.
Materials and Tools You’ll Need
If you’ve determined that your ridge capping needs repair and you’re comfortable doing the work yourself, here are the materials and tools you’ll need:
- New ridge capping tiles
- Tile adhesive
- Sandpaper
- Wire brush
- Safety gear (gloves, eye protection, and non-slip shoes)
- Ladder
Steps to Repairing Your Ridge Capping
Now that you have all the materials and tools you’ll need, here are the steps to repairing your ridge capping:
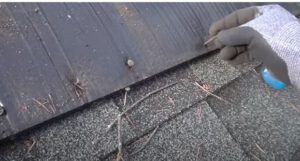
- Remove any damaged ridge capping tiles: Use a wire brush to remove any debris or mortar from the ridge capping tiles that need to be replaced. Carefully remove the old tiles and set them aside.
- Clean the area thoroughly: Use sandpaper to smooth out any rough spots on the surrounding tiles and remove any remaining mortar.
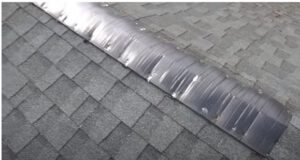
- Apply tile adhesive: Apply a generous amount of tile adhesive to the back of the new ridge capping tile and carefully place it onto the roof, making sure that it lines up with the adjacent tiles.
- Secure the tile in place: Press down firmly on the new tile to secure it in place. Make sure that it’s level with the surrounding tiles.
- Repeat as necessary: Continue to replace damaged ridge capping tiles until all tiles have been replaced.
- Let the tiles dry: Allow the tile adhesive to dry completely before walking on the roof.
Tips for Preventing Future Damage to Your Ridge Capping
 Once you’ve repaired your ridge capping, there are a few things you can do to prevent future damage:
- Keep your gutters clean: Clogged gutters can cause water to overflow onto your roof and seep into your ridge capping.
- Trim overhanging branches: Overhanging branches can scratch and damage your roof, including the ridge capping.
- Inspect your roof regularly: Regular inspections can help you catch any damage early before it becomes a bigger problem.
In conclusion, repairing a roof ridge capping on your Australian home is possible with the right tools and materials. If you’re uncomfortable doing the work yourself, it’s always best to call a professional roofer. By following these steps and taking preventative measures, you can keep your roof in good condition for years to come.